Saturday, July 21, 2012

My Chevron Stairs Makeover

I haven't posted in forever, but I just completed this project last night, and it came out so great, I thought I'd share!  Here are what my stairs looked like yesterday afternoon, before I got started.  I had last painted the risers four years ago before I moved in, and obviously, I haven't been a good girl about cleaning them and/or repainting them to keep them fresh.


Well, that has all changed!  I got a wild hair yesterday, and decided to go for it!
First, I did a base coat of white.


Then I used a triangle cut out of card stock to mark my lines.  I had viewed a tutorial on You Tube from Home Depot, I think it was, to give me the idea of how to go about it.  I wasn't exactly precise about the whole thing, but hey, it's an older house...it just adds to the charm, right?!


So after taping everything off, I painted over it with the black paint (same color as my treads, which I also touched up a bit as I went.)  I let the paint dry most of the way, and then, since I couldn't stand the suspense, I ripped it off last night.  

This morning I went over the whole thing with a small artist's brush and touched up all the white, where the black had bled through the tape.  If I were to do it again, I would not do this project at 11pm.  I'd wait until I was fresh, and a little more diligent about the details.  Overall, though, I'm super happy, and I'm thinking I might have to do this treatment to one of my dressers next.  It's amazing the transformation a little paint can make!


Have a happy weekend!


post signature

Sunday, February 05, 2012

From "meh" to "cool!" with Textures in Photoshop

Before:After:

To get myself jump started with my 2012 blogging, I thought I'd post a step by step before and after of how I got from start to finish on the photo above. I really liked the photo untouched, but I also thought it would look cool with some texture and depth added. I really like the way the clouds look in the "after"...almost like an old postcard.

I'm using Photoshop CS5 right now, but these steps can all be done in Photoshop Elements as well. It's nothing complicated. I'm assuming you have a basic idea of how PS works, so I'm basically just showing my layers and the layer blending modes, and opacities for each. If you have questions, please feel free to post them in the comments, and I'll see if I can help!

Step 1: Open the photo you want to work on. You can click these photos to see my layers panel on the right up close:
Step 2: Here I added a layer of aqua "paint" to warm up my blues and cool off my grass a little. It barely shows up here, but I could really tell the difference once I added my other layers and tried turning this one off and on. I set this layer on Overlay for my blending mode, at 17%:
Step 3: Here I added a texture from Kim Klassen, which I received free from her because I subscribe to her weekly emails. You can sign up too, if you go to her blog HERE. The texture is a creamy background with grungy edges. I set it on Linear Burn at 90% opacity. You can see the instant character it gives the photo:
Step 4: I'm a big fan of fabric textures, so I added one from The Coffee Shop Blog. She has lots of free textures, and her blog has been an invaluable resource for me in everything from figuring out how to use PS, to how to make cool stuff for my blog. HERE is a link to her free textures page. I used her Coffee with Cream fabric texture, in Linear Burn mode, at 54% opacity. Although I loved what this did to my photo, I thought it was a little too dark. However, if I made the opacity less, the effect wasn't showing up enough.:
Step 5: So...my final step was to add Kim Klassen's Revolution texture one more time...this time in Linear Light mode, at 11% opacity. This punched it up a little lighter, and I'm happy:
Helpful Mac Hint of the Day: Aren't you all impressed with my screen shots? Ever since I figured out how to do them, I've been taking screen shots of everything. If you have a Mac, it's easy: CTRL+SHIFT+3. That's it! It plops the screen shot right on your desktop for you. (If you have a Windows machine, there is usually a "PRNT SCRN" button up on the top right area of your keyboard. I believe you click that, and it will prompt you to save the pic. Sorry I'm not much help there. I'm a total Mac junkie now, and I'm beginning to forget what life was like pre-Mac.) ;)

I hope you enjoyed!

post signature

Wednesday, February 01, 2012

I'm Coming Back!

OK, it's a new year, and a new attitude! I'm not sure what I'll be blogging about other than photography and decorating, but I'm going to be making an effort this year, after taking last year off. I'll be starting with MCP Actions' Project 12, which will at least be motivation for me to post once a month! (I'm getting a bit of a late start in February, but whatever. I didn't make any resolutions this year, or else "abolish procrastination" would have been on the list. C'est la vie.

Right now I must go and paint sets for my daughter's play. This year they're doing "Grease" and she is Marty. I can't wait!


post signature

Tuesday, February 08, 2011

Have You Seen It?!

I'm talking about the new Restoration Hardware catalog. I'd just like to say ****droooool****
Aren't these steel beds and the zinc dresser fantastic?!

...and we all know I'm a sucker for a linen slipcover.
This desk is hilarious, and really tickled my fancy. I'd love to know who is buying it, and where they're putting it. My brother-in-law has a plane, but I don't think he'd put this desk in his house, no matter how cool it is:
This couch reminds me of MY couch, so of course now I want to own that awesome coffee table...
This is sleek and lovely:
*swoon*
The whole catalog has this time-worn washed out wood theme going on, that I'm really loving.
I think I may have posted this pic before. I love a winged bed!
This desk appealed to me right away, and then I looked at the description, and it's a copy of a garment table--I'm assuming one that used to have a sewing machine on it? See? It was meant to be! I love that mirror above the desk too.
Tuft me, baby!

LOVE this table, and would love to have a party around it:
Some day I'm going to find me one of these pharmacist cabinets at an antique store, and I'm going to strip it, and it's going to look just like this:
(hey, a girl can dream...)
This mirror: *swoon* again:
Oh how I wish I could pull off this look in my house. I just always gravitate to color, though. I can't help myself. Color makes me happy! Maybe I'll save this look for my beach house:
(like i said...a girl can dream, right?!)
More tables waiting for me to host dinner parties:


...and last but not least, a closer look at the zinc night stand. I love zinc. I once saw a zinc bathtub at an antique store in Hudson, NY, and fell in love:
Go to RestorationHardware.com to see more of this deliciousness. I'm only like 10 pages into the catalog, and this is how excited I got! :) (Oh, to have millions of dollars to blow....)

post signature

Sunday, January 30, 2011

Miraculous Paper Sculptures

Around the holidays, when I was searching the 'net for ideas for my vintage book wreaths, I came across some of the most amazing paper art that I have ever seen. The artist who did the little bird in a tree below is Su Blackwell. You must go check out her website for more of her amazing work. It's whimsical, beautiful, and sometimes even a little bit sad....


This light from Paper Couture is genius, and I'm thinking I'd like to make one some time:
Another artist, Oona Patterson, creates the most amazing things!
These next three are completely different, and are by San Francisco artist Jeff Nishinaka:
I love the soft roundness of his pieces.

I got this pic from DesignModo.com, which is a design website of some sort. I think this was part of an advertising campaign or something. Sorry I'm short on credit for this one. But I just liked the more retro feel of this work:
I think this last one is my favorite from Su Blackwell....a little cabin in the woods:
Someday I'll have one of these....

post signature

Wednesday, January 12, 2011

Winter Wonderland

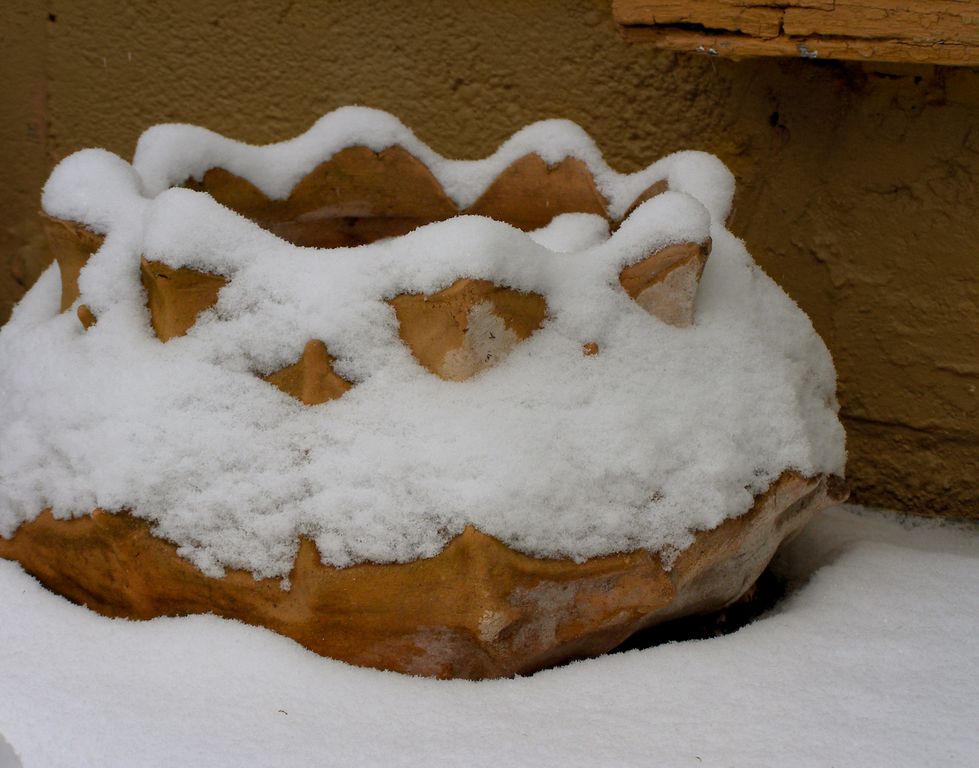
I probably should have brought my pots in....*sigh* I hope too many of them don't get ruined.
Maybe when it warms up I can rescue them.

My little Japanese maple is so picturesque:
Remember you can click the photos to see them larger.
They really look much more impressive that way.


I love this stand of young cedars in my neighbor's yard:
These are lily seed pods. These lilies are incredible when in bloom.
I'll have to get a good picture this summer:
Bittersweet:
Love:
I felt badly for the birds today, with all the snow on the ground. Thank goodness all of my neighbors have bird feeders. I think that's why there were so many birds around this afternoon while I was shoveling. I'm glad SOMEbody's taking care of the poor things!
I took this picture from the end of my driveway.
I hadn't shoveled myself all the way out at this point:
If you've got snow, as I know many of you out there do, make the most of it and enjoy it! Spring will come. I promise!

*all of my photos were edited with Photoshop Elements 8.0 and Lightroom 2.0
post signature
Related Posts Plugin for WordPress, Blogger...